WHAT IS A POWER RACK?
Power racks are the cornerstone of any home gym. And if you’re looking to build your own set up, you’re definitely going to need one.
They’re key in helping you build strength and muscle, as well as helping you to improve power and endurance.
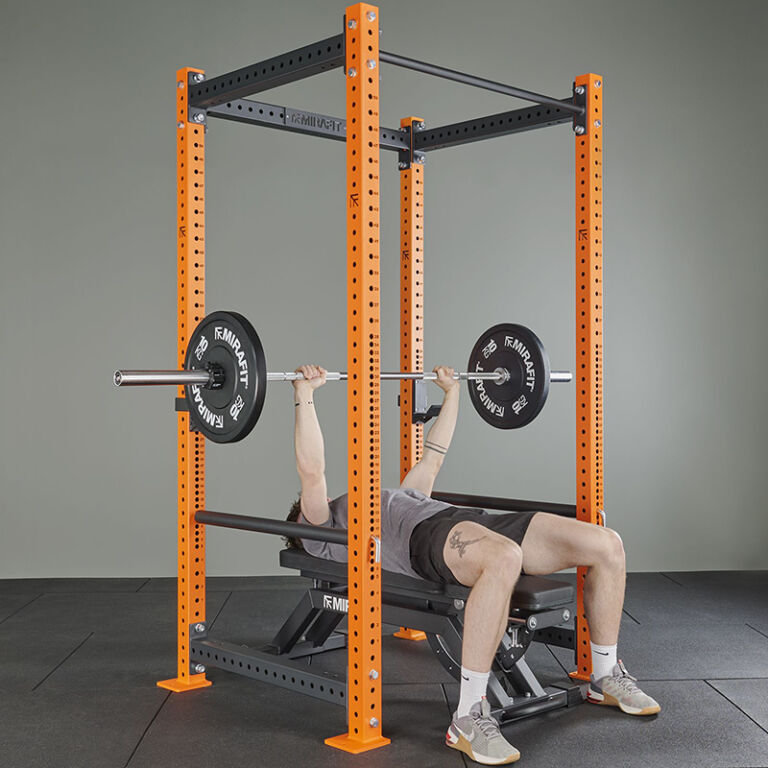
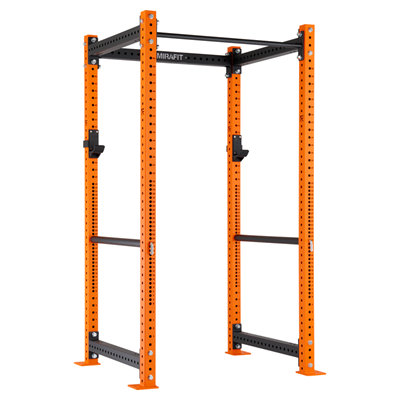
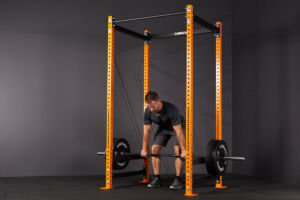
A power rack – or power cage as they’re also known – is essentially a four-sided frame that has been built specifically for weight training. Their key feature is that they allow you to squat and press heavy – without the need for a training partner. The built-in safety bars are designed to catch the barbell should you fail – intentionally or by accident – allowing you to train safely alone.
Power racks can be used for a number of exercises including:
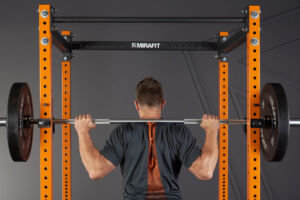
- Squats
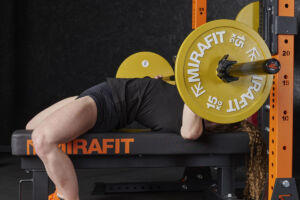
- Bench presses
- Overhead presses
- Pull ups
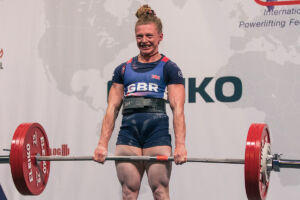
- Partial deadlifts
- Pull ups
- Shrugs and Rack Pulls
- Tricep dips
- Leg/knee raises
- Barbell lunges
- Bent over and inverted rows
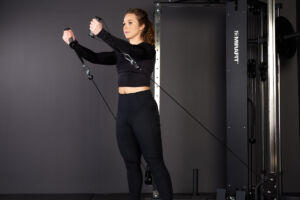
You can also get cable systems for your power rack allowing you to do rows, curls, extensions and pull downs.
WHY USE A POWER RACK?
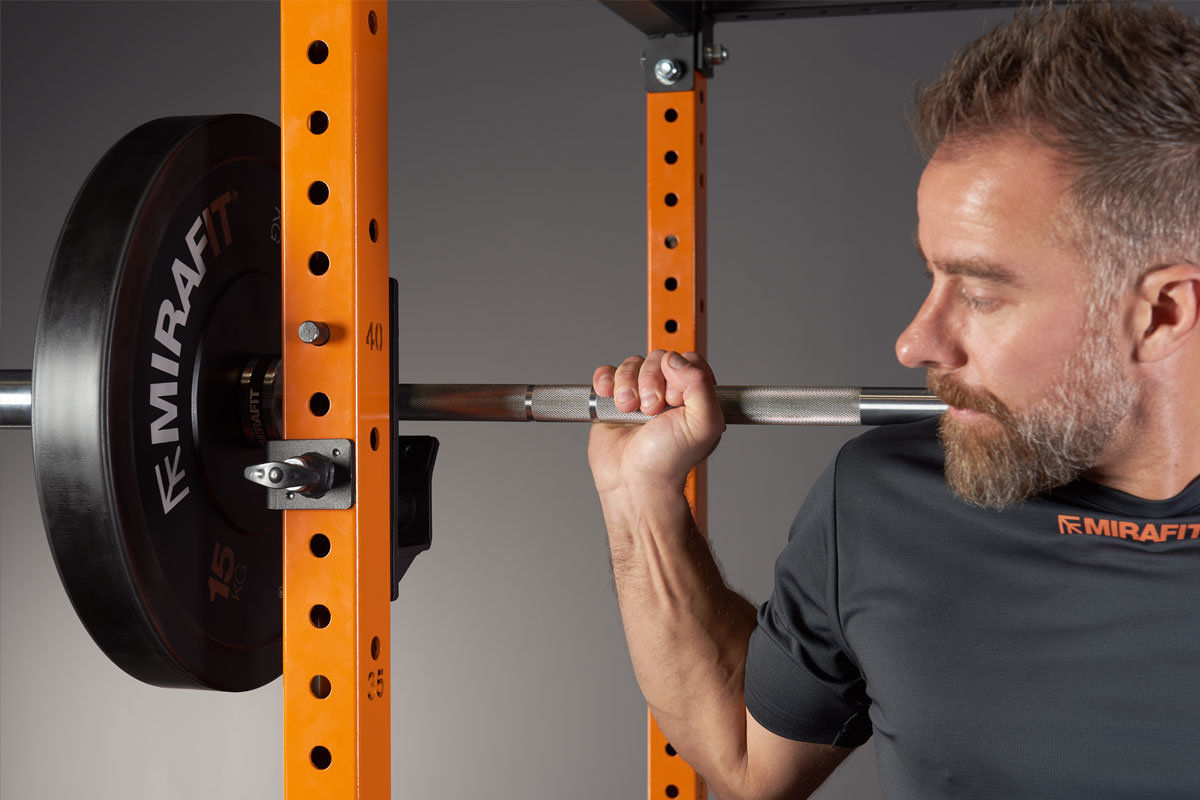
One of the key features that you’re looking for in a power rack is the adjustable safety bars. These allow you to squat and press heavy without a training partner. Set them just above your point of failure and they will catch the bar should you need them to. Training to failure is also key in building strength so they’re vital for both safety as well as progression.
The power rack also has barbell rests which allow you to load and unload your barbell safely while keeping it balanced. Loading the bar this way is much more time-efficient and also means you don’t need to lift the bar up and over your head to squat. It’s not only incredibly dangerous, but it’ll also limit the amount of weight you can squat with, as your arms are naturally weaker than your legs and posterior chain combined.
The frame of the power rack has holes going all the way up it so that you can ensure your bar is level as well as at the correct height. Having holes at regular intervals also allows you to adjust the spotter and bar rack heights depending on who’s using the rack and what exercises they’re doing.
Finally, if you drop the bar onto the spotters, the frame itself will stop the bar from rolling away, limiting any damage to your bar or your surroundings.
Mirafit product designer and fitness expert, Louis Simms, tells us why it’s so important to have a power rack:
Power racks are so versatile, and they can handle much heavier weight loads in comparison to some squat racks. Having a full frame increases the stability – especially if you have it bolted to the floor. And the fixed width means you don’t need to keep adjusting it. Having small increments between each hole down the frame means you can ensure your weight bar and the spotters are exactly the right height for you. They also come with pull up bars so you can get a full body workout without having to drill into any walls.
WHAT TO CONSIDER BEFORE BUYING A POWER RACK
HOW MUCH SPACE DO YOU HAVE AVAILABLE?
If you’re setting up a home gym* or garage gym, then the first thing you will want to establish is how much space you have available.
As well as the size of the power rack, you’ll also need to take into account the size of your barbell. The only weight bars you can use with a power rack are:
These have the correct centre-length to be able to reach the bar racks and stay balanced while you load and unload each side of the bar.
This also means you’ll need to add at least an extra 50cm to 84cm to the total width needed for your power rack (depending on which bar you get) to ensure you have enough for the weight bar sleeves either side.
If you are limited on space, you should consider a foldable rack or the M2 Half Power Rack which is the ideal solution for those who just don’t have the room for a full-sized power rack. You’ll still however need one of the weight bars mentioned above.
*Because of the amount of weight and impact a power rack will have on your floors, we always recommend that you set your gym up on a ground floor – preferably in a garage or basement – and not upstairs.
WHAT DO YOU WANT TO USE IT FOR?
All of our power racks are suitable for beginners and there’s no reason why you shouldn’t take on a Power Rack right from the start.
More advanced lifters however will want to pay attention to the max weight loads of each rack to ensure the cage can handle your current as well as your future, progressive weight loads.
Our power racks can be bolted down for extra stability and for some racks this is essential so something else to keep in mind when choosing the right one for you.
If you’re looking to use your power cage for bench pressing (flat or incline), it’s important to note that some cable systems may restrict you when positioning your weight bench – depending on what type of bench you have.
If you’re unsure about the functionality you’ll need, you could consider getting a separate cable system for your garage gym, such as our Wall Mounted Cable Pulley Station. This leaves you to position your bench more freely when setting up. You can always send us a message via our contact form or social media if you’d like more advice on choosing the right combination of equipment.
POWER RACK ADD-ONS
Power racks are incredibly versatile and there are several things you can do to customise your cage:
- Weight storage bars – these slot into your rack and keep your weights close to hand. Perfect for saving on space as well as keeping your garage gym neat and tidy. Check to see if your frame is 50mm x 50mm or 60mm x 60mm to ensure you get the right size.
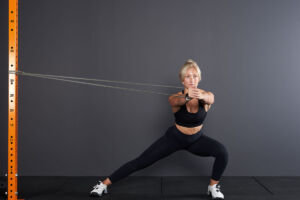
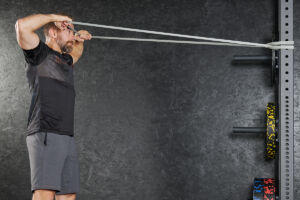
- Resistance band pegs – resistance bands are really effective when it comes to building strength while doing compound exercises, such as squats and bench presses. Resistance band pegs can be fixed onto the bottom of your frame to anchor them and they’re really worthwhile to have.
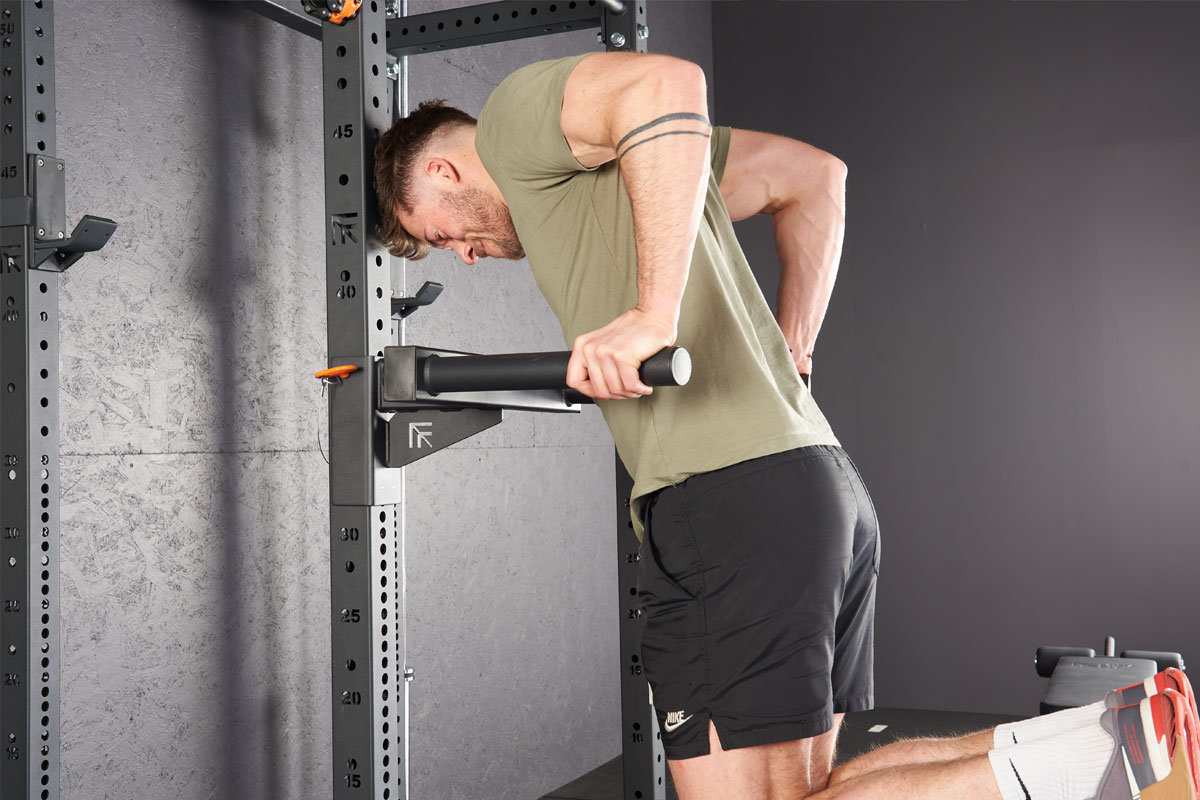
- Dip bars – add on a pair of dip bars to work your chest, triceps and shoulders. These slot into your rack and can be secured and removed quickly and easily. Again, these come in different sizes depending on the size of your frame: 50mm x 50mm or 60mm x 60mm.
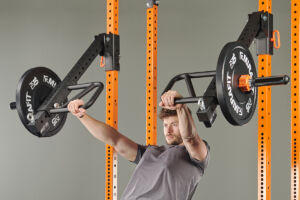
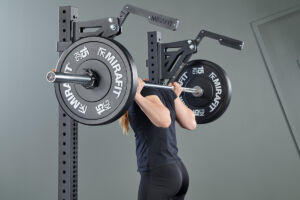
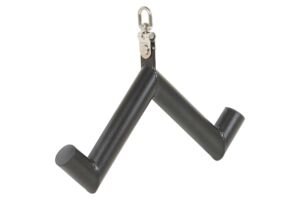
- Jammer Arms – These pivot up from the rack and are primarily used for pressing movements.
POWER RACK FAQs
Buying a power rack
Building a home gym is a big decision and we know how important it is to get it right.
Below is a general overview of all our different types of power racks. We include important information such as types and size. And we also cover the essentials you’ll need to go with it.
This simple overview is perfect for anyone who is new to fitness or has never bought a power rack before.
YOUR GUIDE TO MIRAFIT POWER RACKS
Power racks are really versatile and can be used for a range of exercises and weightlifting disciplines.
Use them to squat and bench press safely, as well as perform a wide range of exercises such as dips, pull ups, curls and more.
Mirafit Power Rack Ranges
M1 Range
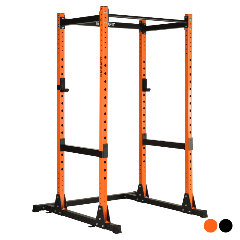
Starting out? The M100 250kg Power Rack has everything you need to train and is a great way to get started. You can also choose to upgrade it with a cable system should you want to supplement your training with a wider variety of exercises. It is made from 50mm box steel sections and has 17 levels of adjustment with each hole 7.5cm apart. There are five compatible accessories you can add.
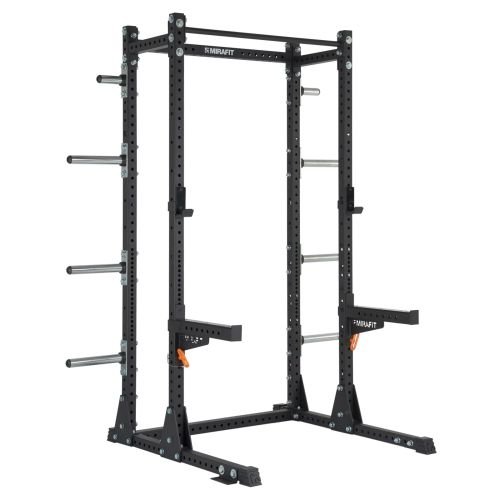
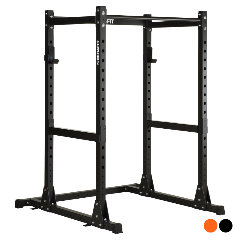
M2 Range
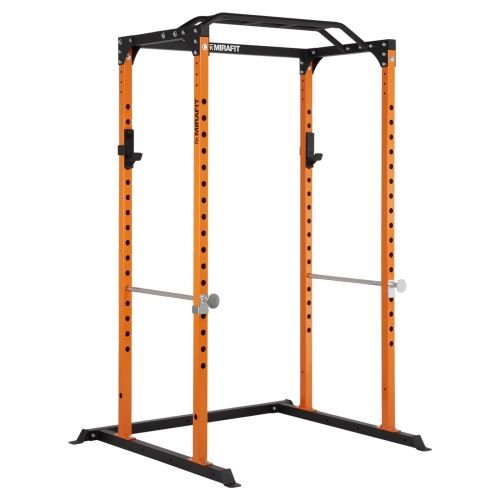
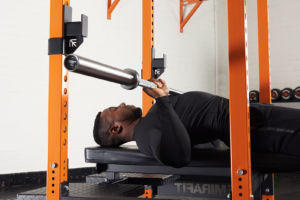
Already lift? Moving up the range, our M2 Power Racks include the M200 Power Rack and the M200S Short Power Rack. With larger 60mm steel box sections these are able to handle more weight than the M1 range and have a wider range of attachments. In total, there are 10 compatible accessories including a cable system, landmine attachment, dip bars, weight storage and spotter arms.
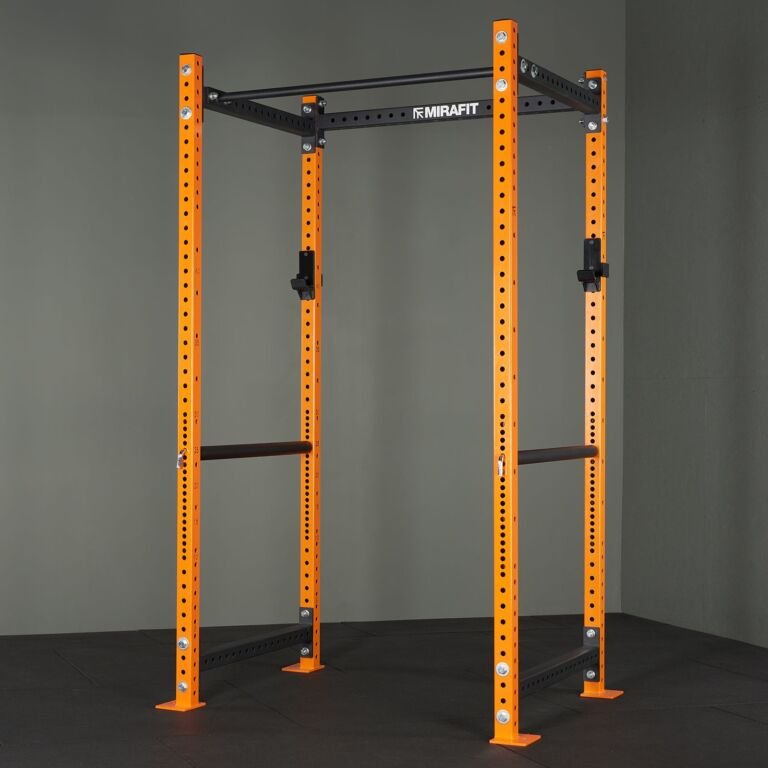
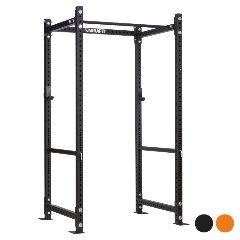
The M2 range also includes the M210 Half Power Rack which includes a straight pull up bar and UHMW lined J-cups. These racks take up less room as they only have two uprights.
Half racks come with the option of a storage system. This means that you can keep all your weights in one place, without additional storage taking up valuable space in your home gym.
M3 Range
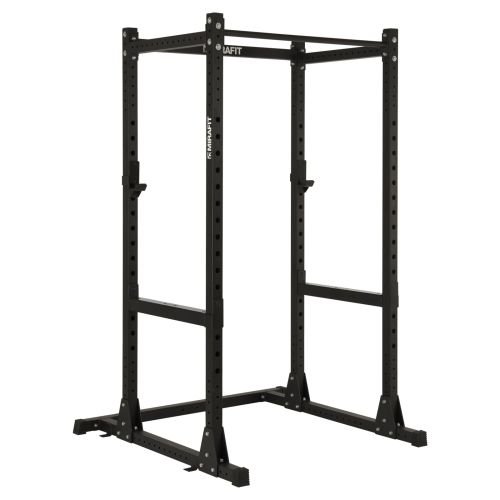
Looking for the ultimate home gym rack? Our M3 range is made using thick 3mm (11 gauge) steel and is available in a choice of 3 heights and 2 depths to suit your gym space. The rack also features westside hole spacing, allowing greater precision when setting spotter and barbell levels when bench pressing. The normal spacing is 50mm apart while the westside spacing zone is 25mm. The M3 range has a massive range of optional accessories and is also available in a half rack version making it highly configurable and a great choice for any home gym or studio.
M4 Range
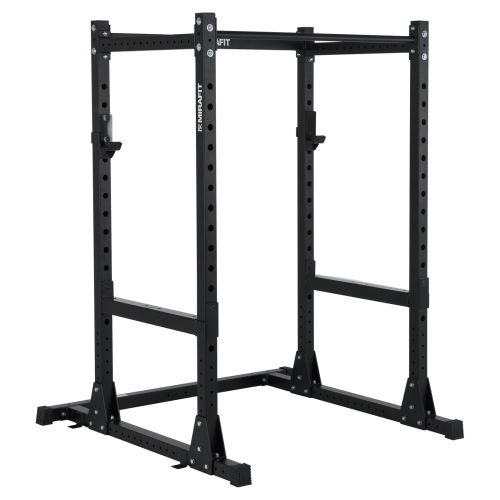
Own or run a gym? Our M4 range is built for commercial spaces and as such is our most heavy-duty kit. Built from 75mm box steel sections, it boasts all the features you’d expect from commercial equipment and has our biggest range of accessories. It is suitable for commercial gyms, schools, universities and businesses.
Within our M4 rack range you can find a flat foot design and a wall mounted rack, as well as a half rack and a squat rack.
 |
 |
 |
 |
 |
|
| M100 Power Rack | M200 Power Rack | M200 Short Power Rack | M3 Power Rack | M4 Power Rack | |
|---|---|---|---|---|---|
| Overall Height: | 213cm (204cm – Pull Up Bar Flipped) |
220cm | 183cm | 188cm/208cm/228cm | 205cm/230cm/255cm | Overall Depth: | 123cm | 141cm | 141cm | 81cm/111cm | 84cm/1114cm/130cm | Overall Width: | 149cm | 147cm | 147cm | 133cm | 136cm | Internal Depth: | 61cm | 74cm | 74cm | 60cm/90cm | 61cm/91cm/107cm | Steel Box Section: | 50mm | 60mm | 60mm | 60mm | 75mm | Pull Up Bar Height: | 213cm (195cm – Pull Up Bar Flipped) |
210cm (Ability to Lower Height) |
173cm | 173cm/193cm/213cm (Ability to Lower Height) |
190cm/215cm/140cm (Ability to lower height) |
Hole Diameter: | 25mm | 25mm | 25mm | 17mm | 17.5mm | Levels of Adjustments: | 17 | 16 | 14 | 40-50 (Including Westside Spacing) |
40-50 (Including Westside Spacing) |
Hole Spacing: | 7.5cm | 8cm | 8cm | 25mm (Westside Spacing) 50mm (Normal Spacing) |
25mm (Westside Spacing) 50mm (Normal Spacing) |
| Barbell Rest Tested To: | 250kg | 350kg | 350kg | – | – | Number of Compatible Accessories: | 5 | 10 | 10 | 25+ | 40+ |
How much room will I need for a power rack?
The height of our power racks varies depending on which one you choose.
- Heights range from around 183cm to 228cm
- Depths range from 81cm to 141cm
You’ll also need to factor in the space around the power rack:
- Space above the pull up bar if you’re doing muscle ups
- Space in front of and behind the power rack for your weight bench – and cable system if you want to upgrade your power rack in the future
- Space around the Power Rack for your weight bar as well as to get around and load your bar.
All our power racks need either:
- A 7ft 20kg Olympic Barbell
- A 6ft International Olympic Barbell (the centre of this bar is the same length as a 7ft bar, but the sleeves are shorter)
- An M3 Women’s 15kg Olympic Barbell
Any bars smaller than the above cannot be racked safely.
Where to put your power rack
Power racks are best placed in garage as you have the benefit of a solid, concrete floor, in a free space that’s not too hot to train in.
We don’t recommend building your home gym upstairs or outside.
What do I need to go with a power rack?
This really depends on your goals and how you want to train.
To cover the basics, you’ll want to make sure you have:
- A weight bar
- Weight plates that fit your bar (usually 2” Olympic Weight Plates)
- A pair of bar collars to secure your weight plates
Somewhere to store your weight plates
A weight bench
Not sure where to start? Check out our Garage Gym Packages which will give you everything you need to get started at the click of a button.
Shipping and delivery
Buying from Mirafit is safe and easy. You can track your order and chat to our customer services team if you need to ask any questions or want to check any details.
Want to know more? Get all the details on our delivery and returns page.
Power racks are extremely versatile and can be used for a wide variety of exercises.
The durable, four-sided frame has been specially designed to handle high-impact workouts. And all of our power racks come with full-length spotter bars which will catch your barbell should you need to fail.
Power racks are ideal for performing all the key compound exercises needed for building strength and mass. These include bench presses, squats and pull ups.
You can also use them to do a full range of accessory lifts such as pin squats and partial deadlifts. Safety bars are essential for doing these kinds of fundamental lifts. So, power racks are vital for helping you to reach your strength goals.
Below, you’ll find everything you need to get set up properly when using your power rack. We also go through some of the ways you can supplement your training.
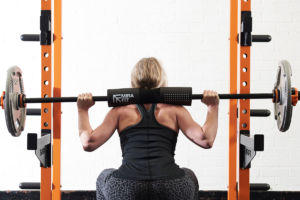
How to set up a power rack for squats
Squats are one of the best exercises for building both strength and mass. And these compound exercises don’t just target your legs. They work the whole of your posterior chain including your hamstrings, glutes and lower back. Front squats will also target your quads, hip flexors and core too.
Squats are extremely efficient when it comes to strength training.
Setting up a power rack for squats is easy. Here are the most important things to remember:
- The rack height should be a couple of inches lower than your shoulders. This makes unracking and racking the bar a lot easier – and safer – as you don’t need to start going up onto your tip toes after doing a full set of squats
- The spotter bars should be around an inch below your fail height. You don’t need a loaded bar to find out what this is. Just use the bar on its own, or even a lighter bar, just so you can see where your natural squat ends. The spotter bars will catch the bar should you fail or simply need to drop the bar. Make sure they’re secured properly before you squat and that they are both at the same height
- Remember, your bar should be centred properly so that your squat load is even on each side.
As you progress your strength training, you may want to try a range of techniques to help push you past your PBs.
Pin squats are particularly useful when working up to your next weight load. For these, you’ll need to set your spotter bars much higher so that the weight bar rests on them when you’re half way down into your squat.
Power Rack Articles
- How to Hatfield Squat
- The Best Gym Purchases for Beginner Lifters
- Mirafit M200 Power Rack Attachments
- Mirafit M3 Power Rack Attachments
- How To Use a Power Rack Monolift Attachment
- The Benefits of Rack Pulls
- Football Bar Workout
- How I Train for Weightlifting and Powerlifting At The Same Time

- How To Do the Spoto Bench Press
- Adam Bishop’s Jammer Arms Masterclass

- Mirafit M4 Power Rack Attachments

- How to Squat in a Power Rack
- Partial Deadlifts vs Full Deadlifts
- How to Spot Your Gym Bro
- Pallof Press Variations
- Bobbie Butters’ Powerlifting Workout
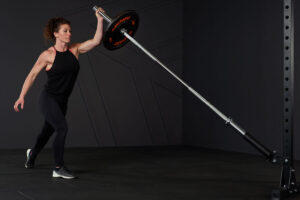
- 20 Best Landmine Exercises
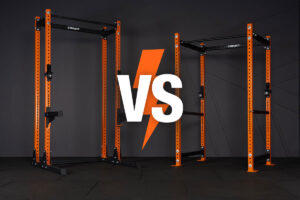
- Power Rack vs Half Rack
- Crush Goals with Cables
- Develop your delts – Full shoulder workout
- 5 Strategies For A Bigger Bench Press
- Best Upper Body Workout Using Cables
- How Much Room Do You Need For A Power Rack?
- How to Bench Press
- How To Use A Power Rack

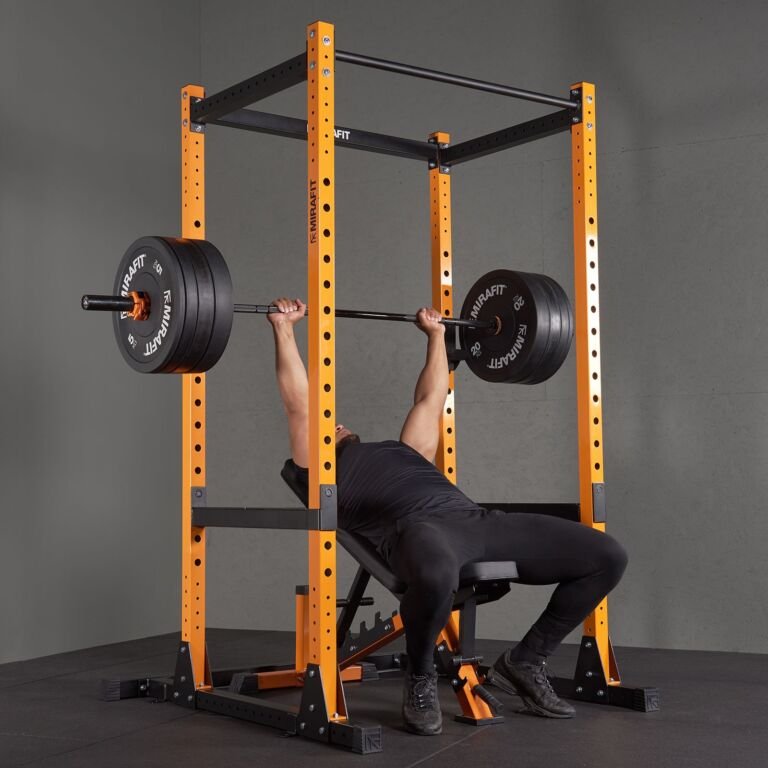
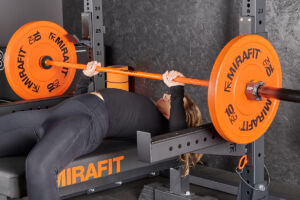
How to set up a power rack for bench presses
You’ll want to include a range of bench presses in your training to help make sure you target your upper, middle and lower chest.
You can do this by adjusting the angle of your weight bench as you train to target each area. You can also supplement your workout with a range of different chest exercises.
For bench pressing, here are the most important things to remember:
- The rack height needs to be a couple of inches lower than your where your hands can reach up to when in bench pressing position. This means your arms will be bent as you reach up to unrack your bar. You then have enough room to straighten your arms out, so you can unrack and rack the bar again. If your arms are straight when you reach up to unrack the bar, you won’t be able to remove the bar that easily – or safely.
- The spotter bars should be set at a height that’s a couple of inches above your chest. However, make sure it’s at a relevant height to the type of bench presses that you’re doing. Basically, you want the spotter bars to catch the bar should you fail – without the bar falling onto you. So, whether you’re doing incline, flat or decline presses, make sure the safety bars are doing their job.
- And finally, just like when you’re doing squats, make sure the weight bar is centred so that the weight load is even on both sides.
Building your workout
Power racks can be used for much more than just squats and bench presses. And because you can adjust the rack and spotter bar heights, there are lots of ways you can get creative with your training.
For example, if you’re working on doing a full pull up, you can use the power rack to do a whole range of progressions such as inverted rows, resistance band lat pull downs and leg assisted pull ups.
You can also use them for deficit deadlifts, as well as bicep curls and dips.
Supplement your training
There are also lots of ways you can supplement and improve your power rack training:
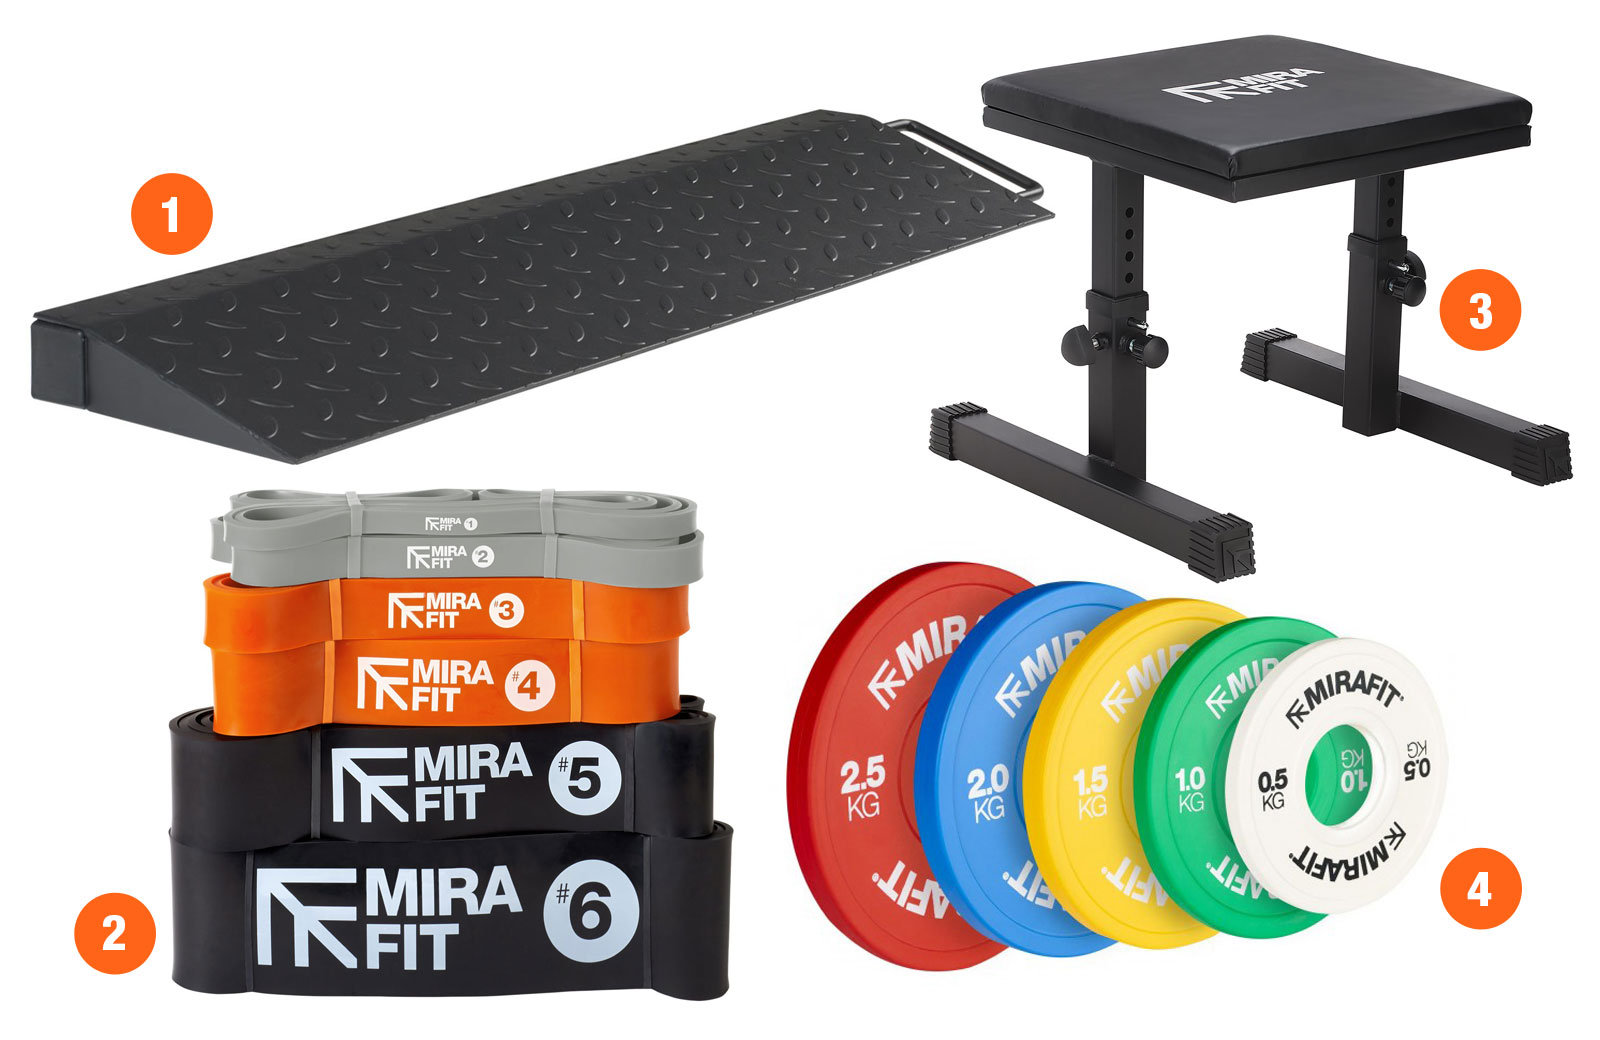
- Squat Ramps – another really useful training aid, squat ramps ease the pressure on your joints as you train. They’re also ideal for those who perhaps are less flexible around the hips and ankles.
- Resistance Bands – once you’ve been training for a while, you might start to find it difficult to push past your one-rep max. That’s why resistance bands are so useful. Wrap them around your barbell and a pair of resistance band pegs (which can be fixed to your cage) and they can challenge you during the easier parts of your squats without straining you during the harder parts.
- Squat Boxes – squat boxes are a fantastic training aid. They not only help you push your weight back as you go down but they also prevent you from using momentum to push yourself back up again.
- Fractional and Change Plates – fractional and change plates are smaller weight plates which allow you to build up your training bit-by-bit. Especially useful if you’ve started to hit a plateau in your training. Not just for squats, you can use them for bench presses and curls too.
For more information, check out our range of Fitness Accessories to see how you can supplement your workouts.
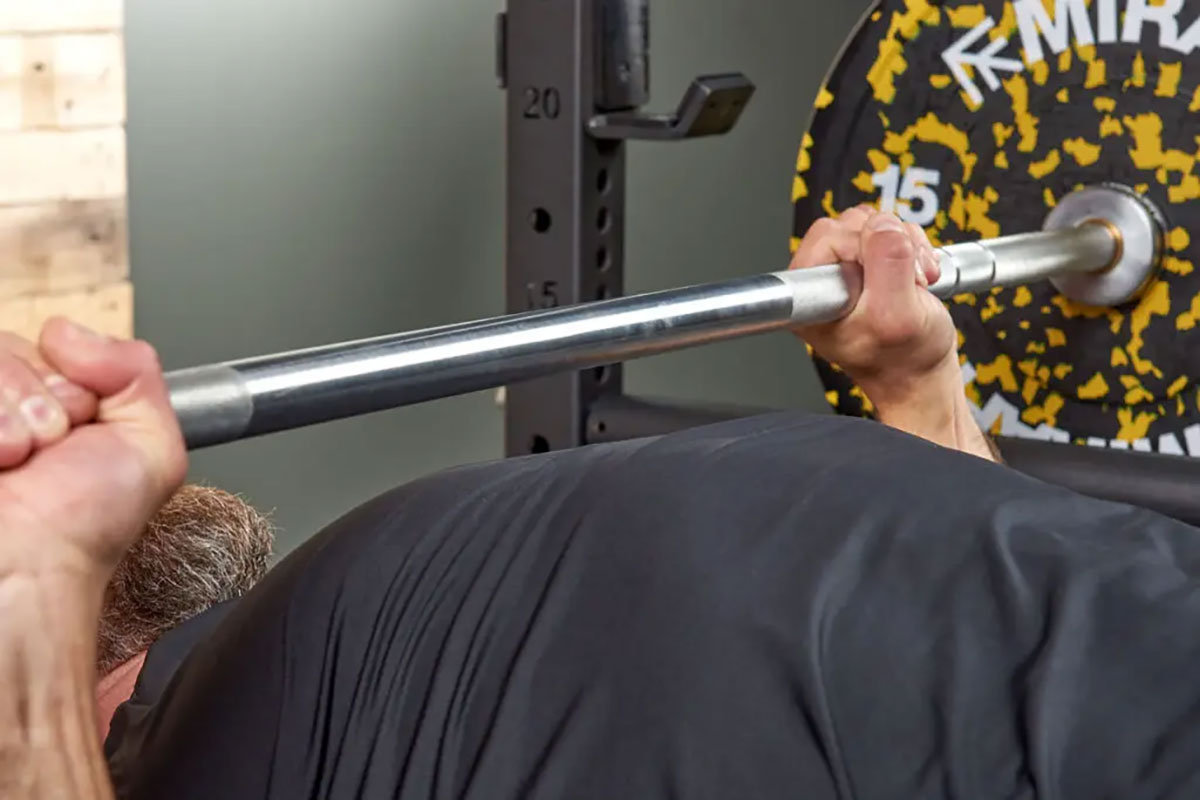
J-cups – the complete guide
J-cups are barbell rests designed to hold your weight bar in a power rack or cage. They can easily be adjusted to different heights using the holes in the vertical stands. The height you choose depends on your own height and the exercise you’re preparing for. The J-cups will be set at a different height for barbell squats, shoulder presses, and bench presses for example.
Types of J-cups
There are three different types of J-Cups, each with their own unique characteristics and benefits.
• Standard J-cups
You’ll find these bar rests on many power racks. They are designed to be mounted onto the rack in one direction only. This prevents the J-cups from swaying when the barbell is being loaded. Most J-cups are lined to stop them from scratching your barbell.
• Sandwich J-cups
These barbell rests feature a liner in the middle which is usually made from nylon or UHMW. The liner ensures there is no metal-on-metal contact between the bar and rack, keeping your barbell in good condition and avoiding scratches.
• Roller J-cups
Roller J-cups allow you to easily centre your barbell in the cups before you start your reps. When you set up for a squat or a press, the barbell should be positioned evenly on your body. If this isn’t the case, one side of the body will be loaded heavier than the other. This can lead to failed reps or even injuries. With Roller J-cups you can easily slide the barbell left to right to find the perfect setup position, without wearing down the cups. The Mirafit Roller J-cups also feature an additional safety knob, which firmly locks the cups in place on the rack.
When considering J-cups, always check that the cups are compatible with your power rack before purchase.
Related Videos
Why buy from Mirafit?
We’re UK based
All of our products are sent to you directly from the UK.
Delivery is just £4.95
Standard delivery from Mirafit costs just £4.95 to UK mainland and we aim to have everything to you within 2-3 working days.

Money back promise
If you’re not completely happy with your purchase, just email us within 30 days of ordering. As long as your items are unused, unbuilt and in the original packaging, you can return them for a full refund of the price paid.
We’re here to help
There are lots of ways you can get in touch with us to talk about our products or about your purchase. You can email our customer services team at [email protected].

5 Star Reviews
We are consistently rated as ’Excellent’ on Trustpilot and have built up a large and loyal customer base. But don’t just take it from us! We’ve got hundreds of 5 star reviews which you can read here.