 4.8/5 ON TRUSTPILOT
Why You Should NEVER Skip Rest Day
Why You Should NEVER Skip Rest Day

No gain without the pain!! Not only have you heard that enough times, but I am sure you are having flashbacks to your PE teachers shouting at you.
While it is fundamentally true that you need to put in the effort to get the rewards, you still need to train smart! And training smart includes sufficient rest in your training program.
Related Products

To cut a long story short, if you don’t allow your body to recover from training then it will never be in a position to improve. If that is all you need to hear then you can stop reading here but for those that would like to know how much rest you should have and which exercises help recovery then I will explain it in more depth.
General Adaptation Syndrome

First let's get an understanding of how fatigue and recovery function in fitness. In the 1930’s Hans Seyle developed the General Adaptation Syndrome (GAS) to explain how the body dealt with stress. While this was developed for non-athletic stress, it has now become the model to explain training stress in athletes. For fitness training we identify four phases.
Initial Response to Stress
The first phase results in the body responding to the stress. The body’s hormonal balance shifts to the negative catabolic state and results in a decrease in performance and short-term fatigue.
Adaptation
If adequate recovery is allowed, then the body starts the adaptation phase where there is shift back to the anabolic hormonal state as the body repairs itself and adapts to the load.
Supercompensation
This is the important phase. As the body is repairing itself, it “overshoots” the mark by improving to a state of greater adaptation than the previous baseline. This state is temporary. If we place another load on the body at this point, then we start the whole process again with the only difference being that the baseline point is higher than before. By constantly training at this point we will experience long term improvement.
Overtraining
This is the phase that we need to avoid. By placing a load on the body that it is not ready for it or if the body hasn’t recovered enough then the net result is that more catabolic hormones are active and results in decreased performance and eventually overtraining.

How to implement the correct recovery into your training
So, understanding the science is great but how do we apply that to your training? Unfortunately, it is not an exact science and each individual responds differently to training stress. There are various methods for measuring recovery. Each method has its advantages and disadvantages. Instead of going through all these methods let's look at some strategies that you can include in your training to make sure that you avoid falling into the overtraining trap.
FIT Principle
This is the most basic principle of training and stands for Frequency, Intensity and Time (or more accurately duration).
All training programs consist of these elements and it is adjusting these elements that results in improvement. Frequency is obviously the number of training sessions, intensity refers to the weight used (generally expressed as 1RM) and duration is the amount of time doing these sessions.
While these elements change for individuals, remember that a less experienced athlete would generally do more gym sessions at a lower intensity and duration while a more experienced athlete would probably initially have fewer sessions, with a higher intensity and duration and as they adapt to the load they could increase the frequency as well.
Allow Sufficient Time Between Sessions
The body requires 24 - 48 hours of recovery from strength training sessions. If you are doing a full body workout then you should have at least one full day recovery before doing the next session.
If you are following split routines make sure that you don’t do the same muscle groups on back-to-back days. However, if you are doing a split routine you might be having too much rest between sessions and not optimising your training.
My suggestion would be to rather break your strength sessions into push and pull exercises. That way you can do 3 - 4 sessions a week to maximise the number of sessions that each muscle gets while still allowing recovery time.
Apply Reload Weeks
Reload weeks are standard for any athlete following a planned training program. It is not a rest week but a week where the loads are reduced to allow for supercompensation to occur.
The most common structure is the 3:1 loading pattern where you would train for 3 weeks followed by a one week reload cycle. For the reload week you would reduce the training load by reducing the number of sets (duration) and the weight (intensity). This also provides the perfect time to include recovery exercises.
Recovery Exercises
During the reload week you will have extra time in each session due to the reduced duration so now you don’t have an excuse to avoid these exercises.
Regular training results in fibrous knots in the muscles called adhesions. These adhesions prevent the muscles from functioning optimally and cause a reduction in the joints range of movement.
By including foam rolling exercises in your reload week you are able to reduce the adhesions and keep the muscles functioning optimally and ready for the next training load.
Monitor Training Loads or Fatigue
Monitor training loads is a science in itself and beyond the scope of the article but I will explain it briefly.
If you were to rate your daily sessions using the Rate of Perceived Exertion scale below and multiplied it by time in minutes for your session then you would get your daily training load.
You could then monitor the total weekly training load and compare it to previous weeks. This allows you to monitor your training load by making sure that there are no sudden spikes in your training as well as making sure that your reload week is actually a lower training load.
RPE is a measure of internal training stress so it can also be useful in identifying early overtraining syndrome. If you suddenly had a spike in your training load and you haven’t changed your program significantly then you should probably introduce a reload week to facilitate recovery and prevent overtraining.

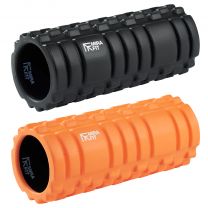
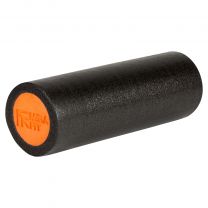
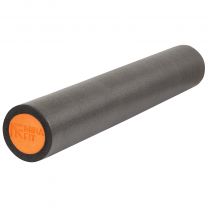
Foam Rollers and Peanut Ball Techniques
What is the point of putting in hours of training but not getting the full benefits? That is like studying an entire textbook to only be tested on the first half of it. You might as well spend less time in the gym.
The two pieces of equipment that I find indispensable when it comes to recovery is the Foam Roller and the Peanut Ball. Both not only help breakdown the muscle adhesions but can also increase range of motion and improve blood flow, thereby speeding up recovery. But what is the best way to use these tools? While there are lots of different opinions. I will explain what works for me.
• Start by slowly rolling up and down the length of the targeted muscle, taking note of the tight spots.
• Spend 30 seconds lying with the foam roller on any of the identified tight spots
• While still lying on the tight spot, slowly bend and straighten the limbs to move the muscle over the foam roller. This can be painful but effective in breaking down the adhesions.
• Perform a couple of stretches after using the rollers to maximise flexibility.
My Top 5 Recovery Exercises

Foam Roller Quads
Lie on your elbows with the foam roller under your quads. Start by slowly rolling the full length of your quads. Then lie on the tight spot and slowly bend and straighten your legs.
Foam Roller ITB
Lie on your side with your elbow supporting you and the foam roller under the outside of your leg. You can have the top leg helping to support the weight. Pull yourself up and down over the foam roller. Then on the tight spot straighten and bend the leg.
Foam Roller Calf
Kneel on the floor and place the foam roller between the calf and the hamstrings and sit down on the foam roller. Gently shift your weight from side to side.
Foam Roller Hamstring
Sit on a bench and place the foam roller under your hamstring so the foot is elevated off the floor. Start by slowly shifting the leg from side to side over the foam roller. Then on the tight spot slowly straighten and bend your leg.
Peanut Lower Back
Start by lying on your back with your knees bent in a sit up position. Place the peanut ball under your lower back with your spine in the gap. Start by slowly moving your body up and down so that the ball rolls along the length of your lower spine. Then start at the bottom of the spine and perform five crunches with the peanut acting as the hinge. Move the peanut up a couple of centimeters and do another five crunches. Repeat this for the length of the lower back.
In conclusion there is hard training and there is smart training. To get the maximum benefits make sure to allow sufficient rest and include recovery exercises to make sure you are not overtraining but rather reaching that supercompensation phase and see your fitness move to new levels.
While you focus on getting enough rest, make sure you know the signs of overtraining.
Written by guest author Brendan McBirnie.
For more content, follow us on Instagram, YouTube, TikTok, and on our official Mirafit Facebook page.
Enter your email to signup to our newsletter
Tags: Misc > Lifestyle
-
Don’t Skip Cardio
 Cardio training is fundamentally different to strength training but we can all benefit from including some cardio.
 -
Dynamic Stretching – How Well Can You Move?
When you perform dynamic stretches you are warming up the muscles and joints so they are better prepared for your workout. -
Best Warm Up Exercises
Is your warm up a twenty-minute jog on the treadmill? Find out how you should be warming up before lifting heavy.


